HOW TO BUILD AN IGLOO
Caught out in a blizzard? Here’s how to stay alive (provided you remembered to bring along your shovel and snow saw…)
By Alf Alderson
1 Choosing a site
First choose a site that has deep enough snow (at least a metre, preferably more), with enough space and not prone to natural hazards such as avalanches. An igloo big enough for two/three people should have a diameter of about 130cm – you can measure this accurately if you plant a ski pole in what will be the middle of your igloo, place the wrist strap of your other pole over it and use it to mark out an accurate circle in the snow.
IGLOO FACT – the word igloo is derived from the Inuit word ‘iglu’, which means ‘home’
2 Preparing the site
Snow needs to be firm to be cut into firm blocks that can be built into an igloo, so you’ll need to stamp around the site in your boots, skis or snowshoes for up to 20 minutes to pack it down densely enough. And you can’t start cutting blocks immediately – after ‘boot packing’ the snow must then be left to ‘set’ for an hour or so, which gives you a good excuse to get out your stove and brew up.
3 Cutting blocks
The two essential tools for any igloo builder are a snow saw and a shovel. Make a ‘quarry’ by digging two trenches in the boot-packed snow, smoothing off the sides. Cut the building blocks from these trenches – ideally they should be the width of the saw handle, the depth of the saw blade and the length of the entire saw.
Cut the back first, then the side, and finally along the bottom, in smooth, clean strokes – you may need to gently prise the blocks away from the surrounding snow, ‘gently’ being the operative word as you don’t want to break them. Those that do break should be saved for filling gaps etc.
IGLOO FACT – Temperatures inside an igloo can be as much as 50C warmer than the outside air temperature, and may reach as much as 16C from body heat alone
4 Laying first blocks
The first two blocks should be cut into uneven halves with a slightly angled slope on the top side (you’ll see why in a minute). Then cut the rest of your blocks to a standard rectangular shape and lay them around the circle you’ve marked out for your igloo. You’ll need to hold the blocks firmly in place until they’re self-supporting, and they should lean inwards at quite a steep angle – don’t worry about them falling over (one or two will inevitably do so but they can be re-sited), you’ll be surprised at just how much they’ll lean without toppling. Cut one longer block to mark the space where the door will go.
5 Building the walls
When you start on the second row you’ll initially be laying the blocks on top of the first two blocks you cut with an angled upper slope – this ensures your igloo’s wall spirals upwards as it increases in height. Each row should lean inwards at a steeper angle than the one below, and you’ll find that there are obvious gaps between blocks, but these can be easily filled with bits of broken blocks or lumps of snow.
IGLOO FACT – Small one-man igloos are still used on Inuit hunting trips for a night or two living in the wild, whilst in traditional Inuit villages large igloos may have had up to five rooms and been the home of as many as 20 people
6 Making the entrance
You can also dig out the floor of the igloo to give yourself more head room, and at the same time make the door – this too involves digging down to create a tunnel in the snow, with the entrance emerging outside the wall of the igloo. When you’re sleeping in the igloo cold air will sink down and be trapped in this space.
7 Laying the last blocks
Ensure you keep some snow blocks inside the igloo to cap the roof – ideally a partner on the outside can help with this.
IGLOO FACT – igloos are architecturally unique in that they are the only domed structures that don’t require any supporting structure either during or after construction
8 Smoothing the walls
When the igloo is finished, crawl inside and build sleeping shelves using the snow you dug out of the floor – this ensure you sleep above the cold air welling up in the lower points of the igloo. Also smooth the walls to prevent any melting snow dripping off protrusions in the wall.
9 On the Roof
A properly built igloo can take the weight of a man on the roof, will stay up all winter and will withstand hurricane force winds.
IGLOO FACT – skilled igloo builders can erect a two-man igloo in an hour or less – a very useful skill when you’re stuck in the teeth of an Arctic blizzard
10 Dinner
If there are a few of you, spare blocks (there will be plenty of these if you’re a novice igloo builder) can be used to build a wall and seats for a dining area – and you’re sure to be ready for a good dinner after your exertions.
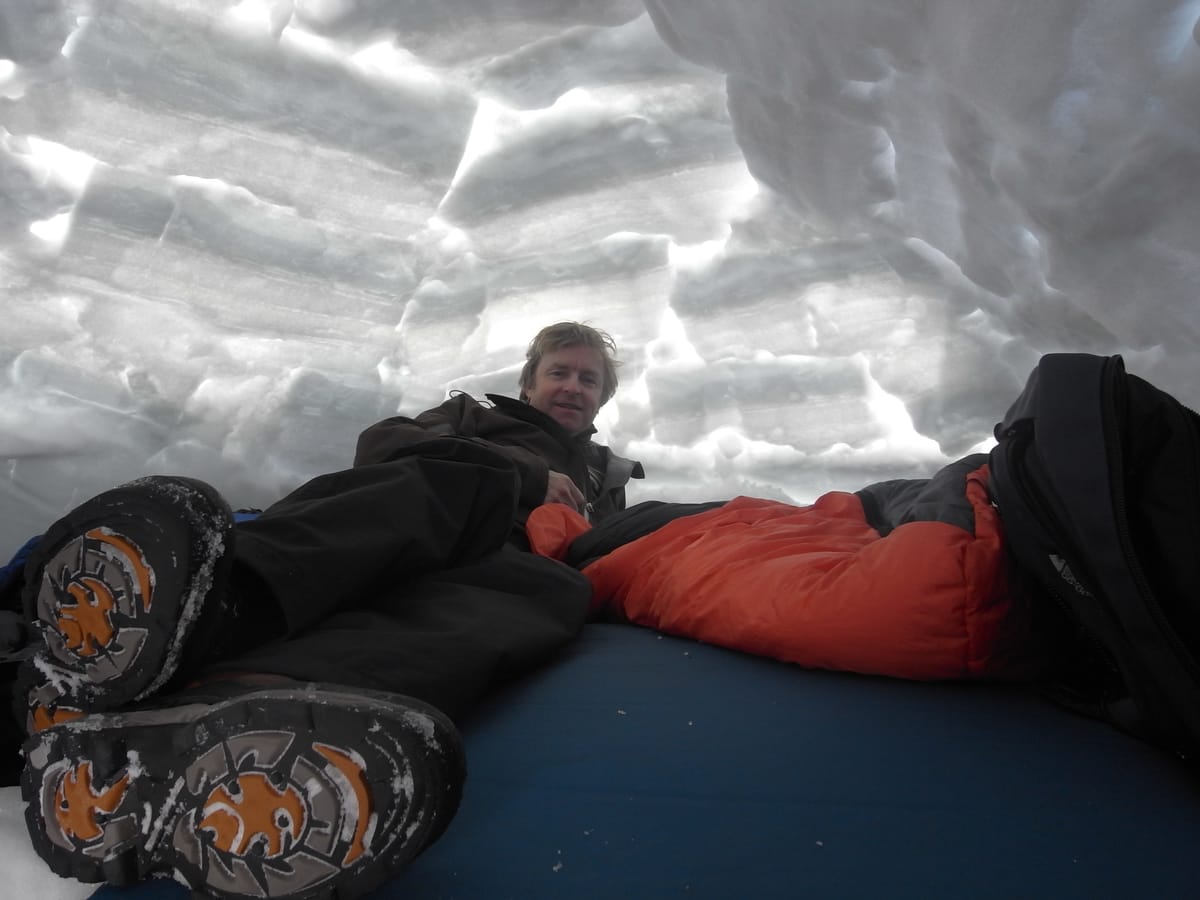
11 Ready for bed
Igloos are obviously much warmer than sleeping outside on a sub-zero Arctic night, but you’ll still need a very good sleeping bag and sleeping mat to stay warm over. A few tea lights provide lovely lighting and don’t cause excessive melting.
IGLOO FACT – igloos were (and to some extent still are) predominantly a feature of western and central Canadian culture although they’re also found in Alaska, Greenland and other high northern latitude regions
12 The morning after
Waking up in an igloo is a great experience – the diffuse light seeping through the walls is a far better alarm call than any beeping alarm clock, and if the sun is shining the peppermint fresh air and wilderness views when you emerge from your cosy (ish) home provide a fine start to the day.
13 Home breaker


For safety reasons when leaving your igloo for the last time you should destroy it – if heavy snowfall covers it other travellers may inadvertently fall through the roof, or someone may be tempted to use an old igloo which could collapse on them. You’ll probably be surprised just how much effort it takes.
West Coast Adventures (www.westcoast-adventures.com) offer various igloo building courses close to Vancouver